Various effects
In the previous article, we introduced several TeshFx effects.
In this article, we will learn how to create a new effect by combining several of these effects.
Prerequisite
It is assumed that the following environment is already in place, so if you do not have it yet, please follow the links to prepare it.
- Processing must be installed.
–>If not yet: Install Processing (Windows version, Mac version, Linux version) - Version 0.0.5 or later of TeshFx must be installed.
→If not yet, or 0.0.4 or older: Install TeshFx, install TeshFx.
Chain Filter
A combination of multiple filters is called a chain filter in TeshFx. This means “multiple filters joined together in a chain”.
A chain filter itself is also a TeshFx filter, so you can consider it as “combining multiple filters to create a new filter.
The chain filter is called a TeshFxChainFilter, and it connects multiple filters together in the following way
  TeshFxFilterChain chain = new TeshFxFilterChain()  // Generate a chain filter
                              .add(filter1)  // add the 1st filter to the chain filter
                              .add(filter2)  // add the 2nd filter to the chain filter
			…
                              .add(filterN);  // add the Nth filter to the chain filter
Filters can be connected in any number of ways like this. To execute this, you can simply do the following like other filters.
chain.filter(source_image);The chained filters are executed in the order they are added.
Reduce color filter
Here is one more filter before we get into the example of using a chain filter to connect multiple filters.
It is the TeshFxReduceColorFilter.
This filter reduces the number of colors in an image. In general, the more colors in a photo image, the more beautiful and natural it will look. But various effects can be applied by dropping the number of colors.It can also reduce the file size when saved to a file.
Examples of the use of this color reduction filter are shown below.
PImage image; // Declare variable image
import teshfx.filter.*; // Declares that TeshFxFilter is used
void setup() {
size(480, 640); // Specify window size as 480x640
//// Create a TeshFxEdgeFilter and assign it to the variable "edgeFilter"
image = loadImage("https://coding4.art/wp-content/uploads/2022/11/teshnakamura.jpg");
TeshFxFilter reduceFilter = new TeshFxReduceColorFilter() // Create a TeshFxReduceColorFilter
.colors(4) // Set colors to 4
.init(); // Final processing when parameters are set
// Apply a color reduction filter to image
image = reduceFilter.filter(image);
}
void draw() {
image(image, 0, 0); // display “image”
}
void dispose() {
save("chained.png"); // Save the effected image
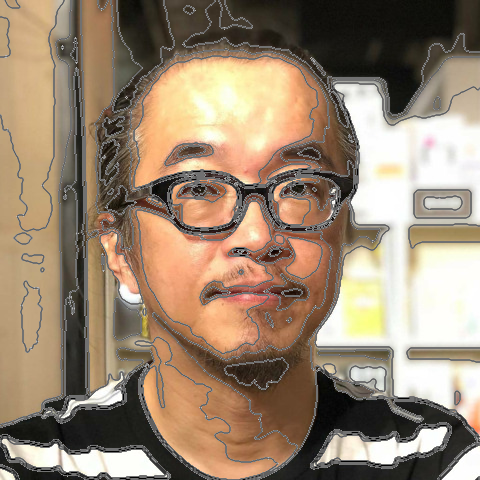
}When you execute this, the following image is displayed.
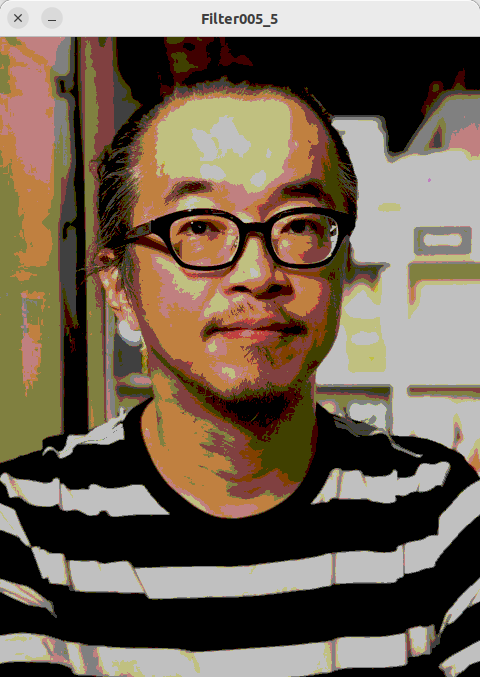
Compared to the original photo, it looks more like an illustration.
In line 12, the parameter “colors” is set to 4, but this does not mean “set the number of colors to 4”. When creating colors on a computer, there is a method of expressing colors using the three primary colors of RGB (Red Green Blue). By default, Processing expresses red, green, and blue in 256 steps each. In other words, the cube of 256 is 16,777,216. The colors parameter of the primary color filter determines the number of colors for red, green, and blue, and if the value is set to 4, the number of colors is 64, or 64 colors to the third power of 4. In other words, the 16,777,216 colors are reduced to 64 colors.
If you want to set the number of red, green, and blue colors to different values, you can write the following too.
.colors(number of red, number of green, number of blue)In other words, .colors(4) is the same as .colors(4, 4, 4).
Example using chain filter
Now back to the chain filter.
Here we will create a new filter for the effect “Reduce Color –> Edge” using the Reduce Color Filter.
PImage image; // Declare variable image
import teshfx.filter.*; // Declares that TeshFxFilter is used
void setup() {
size(480, 640); // Specify window size as 480x640
//Download the image specified by URL from the Internet and assign it to the "image" variable
image = loadImage("https://coding4.art/wp-content/uploads/2022/11/teshnakamura.jpg");
TeshFxFilter reduceFilter = new TeshFxReduceColorFilter() // Create a TeshFxReduceColorFilter
.colors(4) // set colors to 4
.init(); // Final processing when parameters are set
TeshFxFilter edgeFilter = new TeshFxEdgeFilter(); // Create a TeshFxEdgeFilter
// Create a chain filter
TeshFxFilterChain chain = new TeshFxFilterChain()
.add(reduceFilter) // Add TeshFxReduceColorFilter to the chain filter
.add(edgeFilter); // Add TeshFxEdgeColorFilter to the chain filter
// Apply the chain filter to image
image = chain.filter(image);
}
void draw() {
image(image, 0, 0); // display “image”
}
void dispose() {
save("chained.png"); // Save the effected image
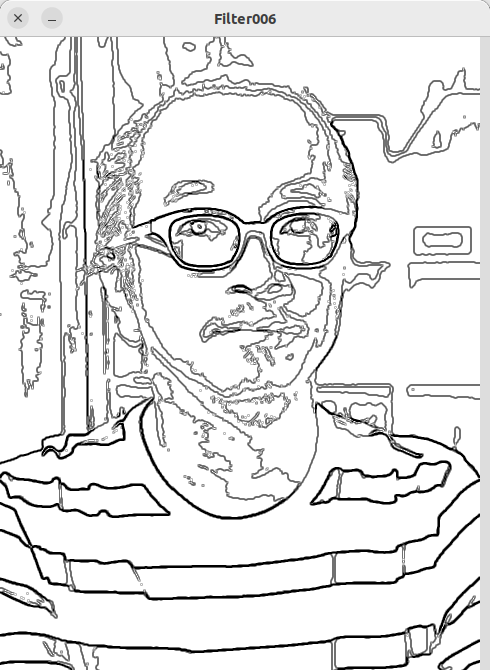
}When you execute this, , the following image is displayed.
The noise has been eliminated and the image looks more like a line drawing than the previous edge filter alone.
The explanation of the code is as follows
Lines 11-14
Here, the filters that will be chained from this, a reduce colors filter, and an edge filter are generated.
Lines 17-19
Here, a chain filter is generated, connecting the two filters just generated.
Line 20
The chain filter is applied to image.
Change the order in which they are connected.
Let’s replace lines 18 and 19 as follows.
                              .add(edgeFilter) // Add TeshFxEdgeColorFilter to the chain filter
                              .add(reduceFilter);  // Add TeshFxReduceColorFilter to the chain filter
The previous effect was to “reduce colors from the image and then take the edges of the image to make a line drawing,” but if the order in which they are added to the chain filter is swapped as shown above, it becomes “take the edges of the image to make a line drawing and then reduce colors.
When this is executed, the following image is displayed.
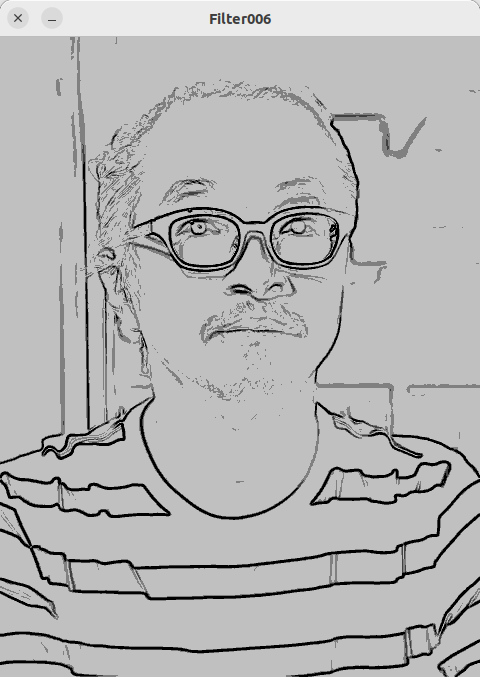
The result image has changed just by switching the order of applying the filters.
Connect 3 or more filters
In the previous code, two filters were connected to create a new filter, but there is no limit to the number of filters that can be connected. Of course, the more filters you add, the longer it will take to process.
Now, as an example, we put a blur filter in front of the two filters in the previous example to create a new filter with three filters: “blur–>decolorize–>edge”. The code is as follows.
PImage image; // Declare variable image

import teshfx.filter.*; // Declares that TeshFxFilter is used


void setup() {
  size(480, 640); // Specify window size as 480x640
  //Download the image specified by URL from the Internet and assign it to the "image" variable
  image = loadImage("https://coding4.art/wp-content/uploads/2022/11/teshnakamura.jpg");

  TeshFxFilter blurFilter = new TeshFxBlurFilter()  // Create a TeshFxBlurFilter
           .radius(5)  // Set radius to 5
           .init();
  TeshFxFilter edgeFilter = new TeshFxEdgeFilter();   // Create a TeshFxEdgeFilter
  TeshFxFilter reduceFilter = new TeshFxReduceColorFilter() // Create a TeshFxReduceColorFilter
               .colors(4)  // Set colors to 4
               .init();    //  Final processing when parameters are set

  // Create a chain filter
  TeshFxFilterChain chain = new TeshFxFilterChain()
                              .add(blurFilter)    // Add TeshFxBlurColorFilter to the chain filter
                              .add(reduceFilter)  // Add TeshFxReduceColorFilter to the chain filter
                              .add(edgeFilter);   // Add TeshFxEdgeColorFilter to the chain filter

  // Apply the chain filter to image
  image = chain.filter(image);
}

void draw() {
  image(image, 0, 0); // display “image”
}

void dispose() {
  save("chained.png"); // Save the effected image
}
Compared to the previous code, the only changes are in generating the filters and adding them to the chain filter.
When this is executed, the following image is displayed.
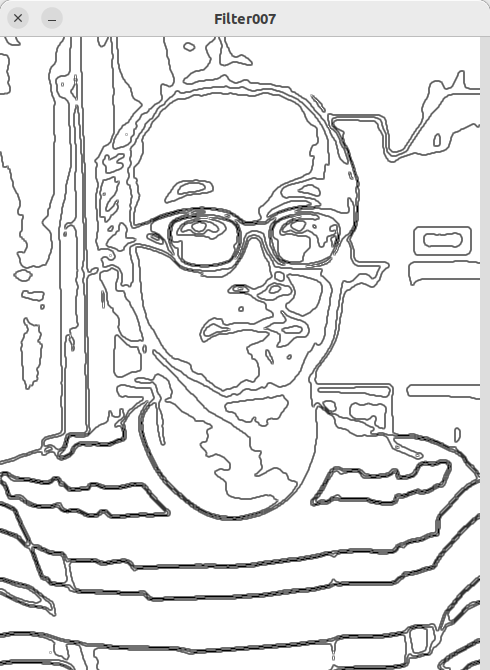
By adding a blur filter before “Color Reduction–>Edges,” the noise was reduced and the drawing looked more like a rather abbreviated drawing than a line drawing.
Overlay and transparency filters
Overlay filter
Now we want to overlay the above line drawing on the original image.
The filter used to overlay the two images is the TeshFxOverlayFilter.
First, please see the code below as an example of how to use this overlay filter.
PImage image; // Declare variable image

import teshfx.filter.*; // Declares that TeshFxFilter is used


void setup() {
  size(480, 640); // Specify window size as 480x640
  //Download the image specified by URL from the Internet and assign it to the "image" variable
  image = loadImage("https://coding4.art/wp-content/uploads/2022/11/teshnakamura.jpg");

  //Download another image from the Internet and assign it to the variable "image2"
  PImage image2 = loadImage("https://coding4.art/wp-content/uploads/2022/11/name.png");

   // Create a TeshOverlayFilter
  TeshFxFilter overlay = new TeshFxOverlayFilter(image);

  // Overlay a line on the image
  image = overlay.filter(image2);
}

void draw() {
  image(image, 0, 0); // display “image”
}

void dispose() {
  save("chained.png"); // Save the effected image
}
This is an example of downloading another image in addition to the existing handsome image and overlaying it on the handsome image.
When you run it, you will see… What? The handsome guy is not displayed.
The image2 overlaid on top of the image has no transparent area, so it seems to have overwritten the handsome guy image.

So, rewrite the URL in line 12.
PImage image2 = loadImage("https://coding4.art/wp-content/uploads/2022/11/name2.png"); This file, name2.png, is the one that has the transparent background of the previous image.
Let’s execute it again.

His name is overlaid on the handsome guy image.
The TeshFxOverlayFilter is generated in line 15 of this code. The overlay filter requires a base image (the bottom image) to be specified when it is generated. In this case, “it is image”.
Then, in line 18, the filter is applied. At this time, the image to be overlaid is specified.
Transparency Filters
The above text was properly overlaid by manually making the background of the text image (image) transparent, but let’s try this in code.
I want to overlay the line drawing I just created on the handsome guy image, but the line drawing also has a white background, so I cannot overlay it properly. To solve this problem, I would like to introduce TeshFxTransparentFilter, a filter that makes a specific color transparent.
TeshFxTransparentFilter can be generate as follows.
  TeshFxFilter <variable name>  = new TeshFxTransparentFilter()
	.backgroundcolor(<RGB of background color>)
              .torelance(<torelance>)
              .init();
The parameter backgroundcolor is the background color in RGB. The parameter torelance is a tolerance for determining the background color. Even if the background color is specified as a certain color, a certain amount of error must be tolerated, as some photos may not match the specified color perfectly while others do, due to subtle errors in the background color. The default value of this parameter is 10, so if the transparency does not work, you can adjust this value.
Now, let’s overlay the line drawing on the handsome image using the overlay and transparency filters. The code is as follows
PImage image; // Declare variable image
import teshfx.filter.*; // Declares that TeshFxFilter is used
void setup() {
size(480, 640); // Specify window size as 480x640
//Download the image specified by URL from the Internet and assign it to the "image" variable
image = loadImage("https://coding4.art/wp-content/uploads/2022/11/teshnakamura.jpg");
TeshFxFilter blurFilter = new TeshFxBlurFilter() // Create a TeshFxBlurFilter
.radius(5) // Set radius to 5
.init();
TeshFxFilter edgeFilter = new TeshFxEdgeFilter(); // Create a TeshFxEdgeFilter
TeshFxFilter transparentFilter = new TeshFxTransparentFilter() // Create a TeshFxTransparentFilter
.torelance(60) // Set torelance to 60
.init();
// Create a TeshChainFilter
TeshFxFilterChain chain = new TeshFxFilterChain()
.add(blurFilter) // Add TeshFxBlurColorFilter to the chain filter
.add(edgeFilter) // Add TeshFxEdgeColorFilter to the chain filter
.add(transparentFilter); // Add TeshFxTransparentColorFilter to the chain filter
// Substitute the chain filter applied to image into line
PImage line = chain.filter(image);
// Create a TeshOverlayFilter
TeshFxFilter overlay = new TeshFxOverlayFilter(image);
// Overlay line on image
image = overlay.filter(line);
}
void draw() {
image(image, 0, 0); // display “image”
}
void dispose() {
save("chained.png"); // Save the effected image
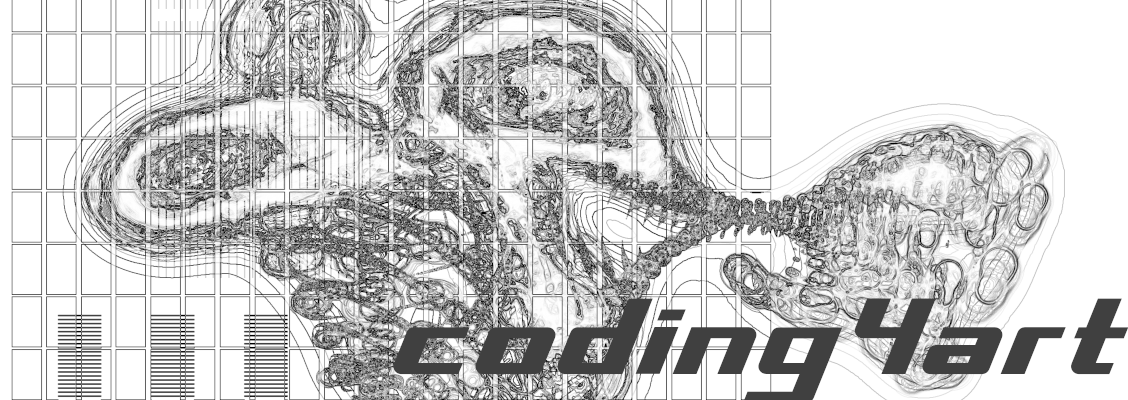
}When you run it, you will get a nice photo effect with a nice border.
Lines 19-21 generate a transparency filter and set its torelance value to 60.
Lines 24-27, which add the filter to the chain filter, are exactly the same as the previous line drawing, but line 28 adds a transparency filter to it.
Line 30 assigns this chained filtered image to another variable called line.
Then, line 33 creates an overlay filter based on the original handsome image, and line 36 overlays this base image with the line taken earlier.
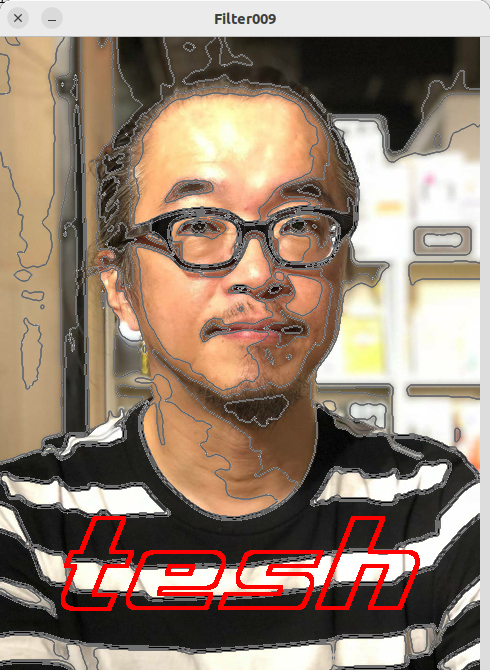
In the example below, line 38 overlays a line drawing on the handsome image, and line 41 overlays more text on the image with the line drawing overlaid.
PImage image; // Declare variable image

import teshfx.filter.*; // Declares that TeshFxFilter is used


void setup() {
  size(480, 640); // Specify window size as 480x640
  //Download the image specified by URL from the Internet and assign it to the "image" variable
  image = loadImage("https://coding4.art/wp-content/uploads/2022/11/teshnakamura.jpg");

  //Download another image from the Internet and assign it to the variable "image2"
  PImage name = loadImage("https://coding4.art/wp-content/uploads/2022/11/name2.png");

  TeshFxFilter blurFilter = new TeshFxBlurFilter()  // Create a TeshFxBlurFilter
           .radius(5)  // Set radius to 5
           .init();
  TeshFxFilter edgeFilter = new TeshFxEdgeFilter();   // Create a TeshFxEdgeFilter
  TeshFxFilter reduceFilter = new TeshFxReduceColorFilter() // Create a TeshFxReduceColorFilter
               .colors(4)  // Set colors to 4
               .init();    // Final processing when parameters are set

  TeshFxFilter transparentFilter  = new TeshFxTransparentFilter()   // Create a TeshFxTransparentFilter
              .torelance(60)  // Set torelance to 60
              .init();        // Final processing when parameters are set
   // Create a TeshChainFilter
                                TeshFxFilterChain chain = new TeshFxFilterChain()
                              .add(blurFilter)    // Add TeshFxBlurColorFilter to the chain filter
                              .add(edgeFilter)   // Add TeshFxEdgeColorFilter to the chain filter
                              .add(transparentFilter);   // Add TeshFxTransparentColorFilter to the chain filter

  // Substitute the chain filter applied to image into line
  PImage line = chain.filter(image);

   // Create a TeshOverlayFilter
  TeshFxFilter overlay = new TeshFxOverlayFilter(image);

  // Overlay line on image
  image = overlay.filter(line);

  // Overlay name on image
  image = overlay.filter(name);
}

void draw() {
  image(image, 0, 0); // display “image”
}

void dispose() {
  save("chained.png"); // Save the effected image
}
When this is done, both line art and text are overlaid.
Summary
- Chain filters are used to connect multiple filters together.
- A chain filter is itself a filter, so it can be used like any other filter.
- A color reduction filter is a filter that reduces the number of colors in a photo or other image.
- The overlay filter overlays one image on another.
- The transparent filter makes the specified color transparent, and can be used in combination with the Overlay filter to create a layered effect.
- You can create unique effects by connecting multiple filters together or by using various techniques.